• Home
  • About
  • Portfolio
  • Packages & Investment
  • Blog
    • All Style
    • Style Diary
    • Capsule Wardrobe
    • Inspiration
    • Bump Style - pregnancy fashion
    • Mum Style
    • All Lifestyle
    • Home + Interiors
    • Travel
    • Simple Living
    • Wedding
    • Health + Happiness
    • Beauty
    • Food
    • Mum + Baby
Menu

Lauren Natalia

Street Address
City, State, Zip
Phone Number
Perth Family Photographer

Your Custom Text Here

Lauren Natalia

  • Home
  • About
  • Portfolio
  • Packages & Investment
  • Blog
  • Style
    • All Style
    • Style Diary
    • Capsule Wardrobe
    • Inspiration
    • Bump Style - pregnancy fashion
    • Mum Style
  • Lifestyle
    • All Lifestyle
    • Home + Interiors
    • Travel
    • Simple Living
    • Wedding
    • Health + Happiness
    • Beauty
    • Food
    • Mum + Baby
Lauren Natalia Blog Header Collage 6000 px x 1000 px.png

Blog

How To: DIY Personalised Bridesmaid Coat Hangers

August 12, 2017 Lauren Natalia
How to DIY bridesmaid hangers.jpg

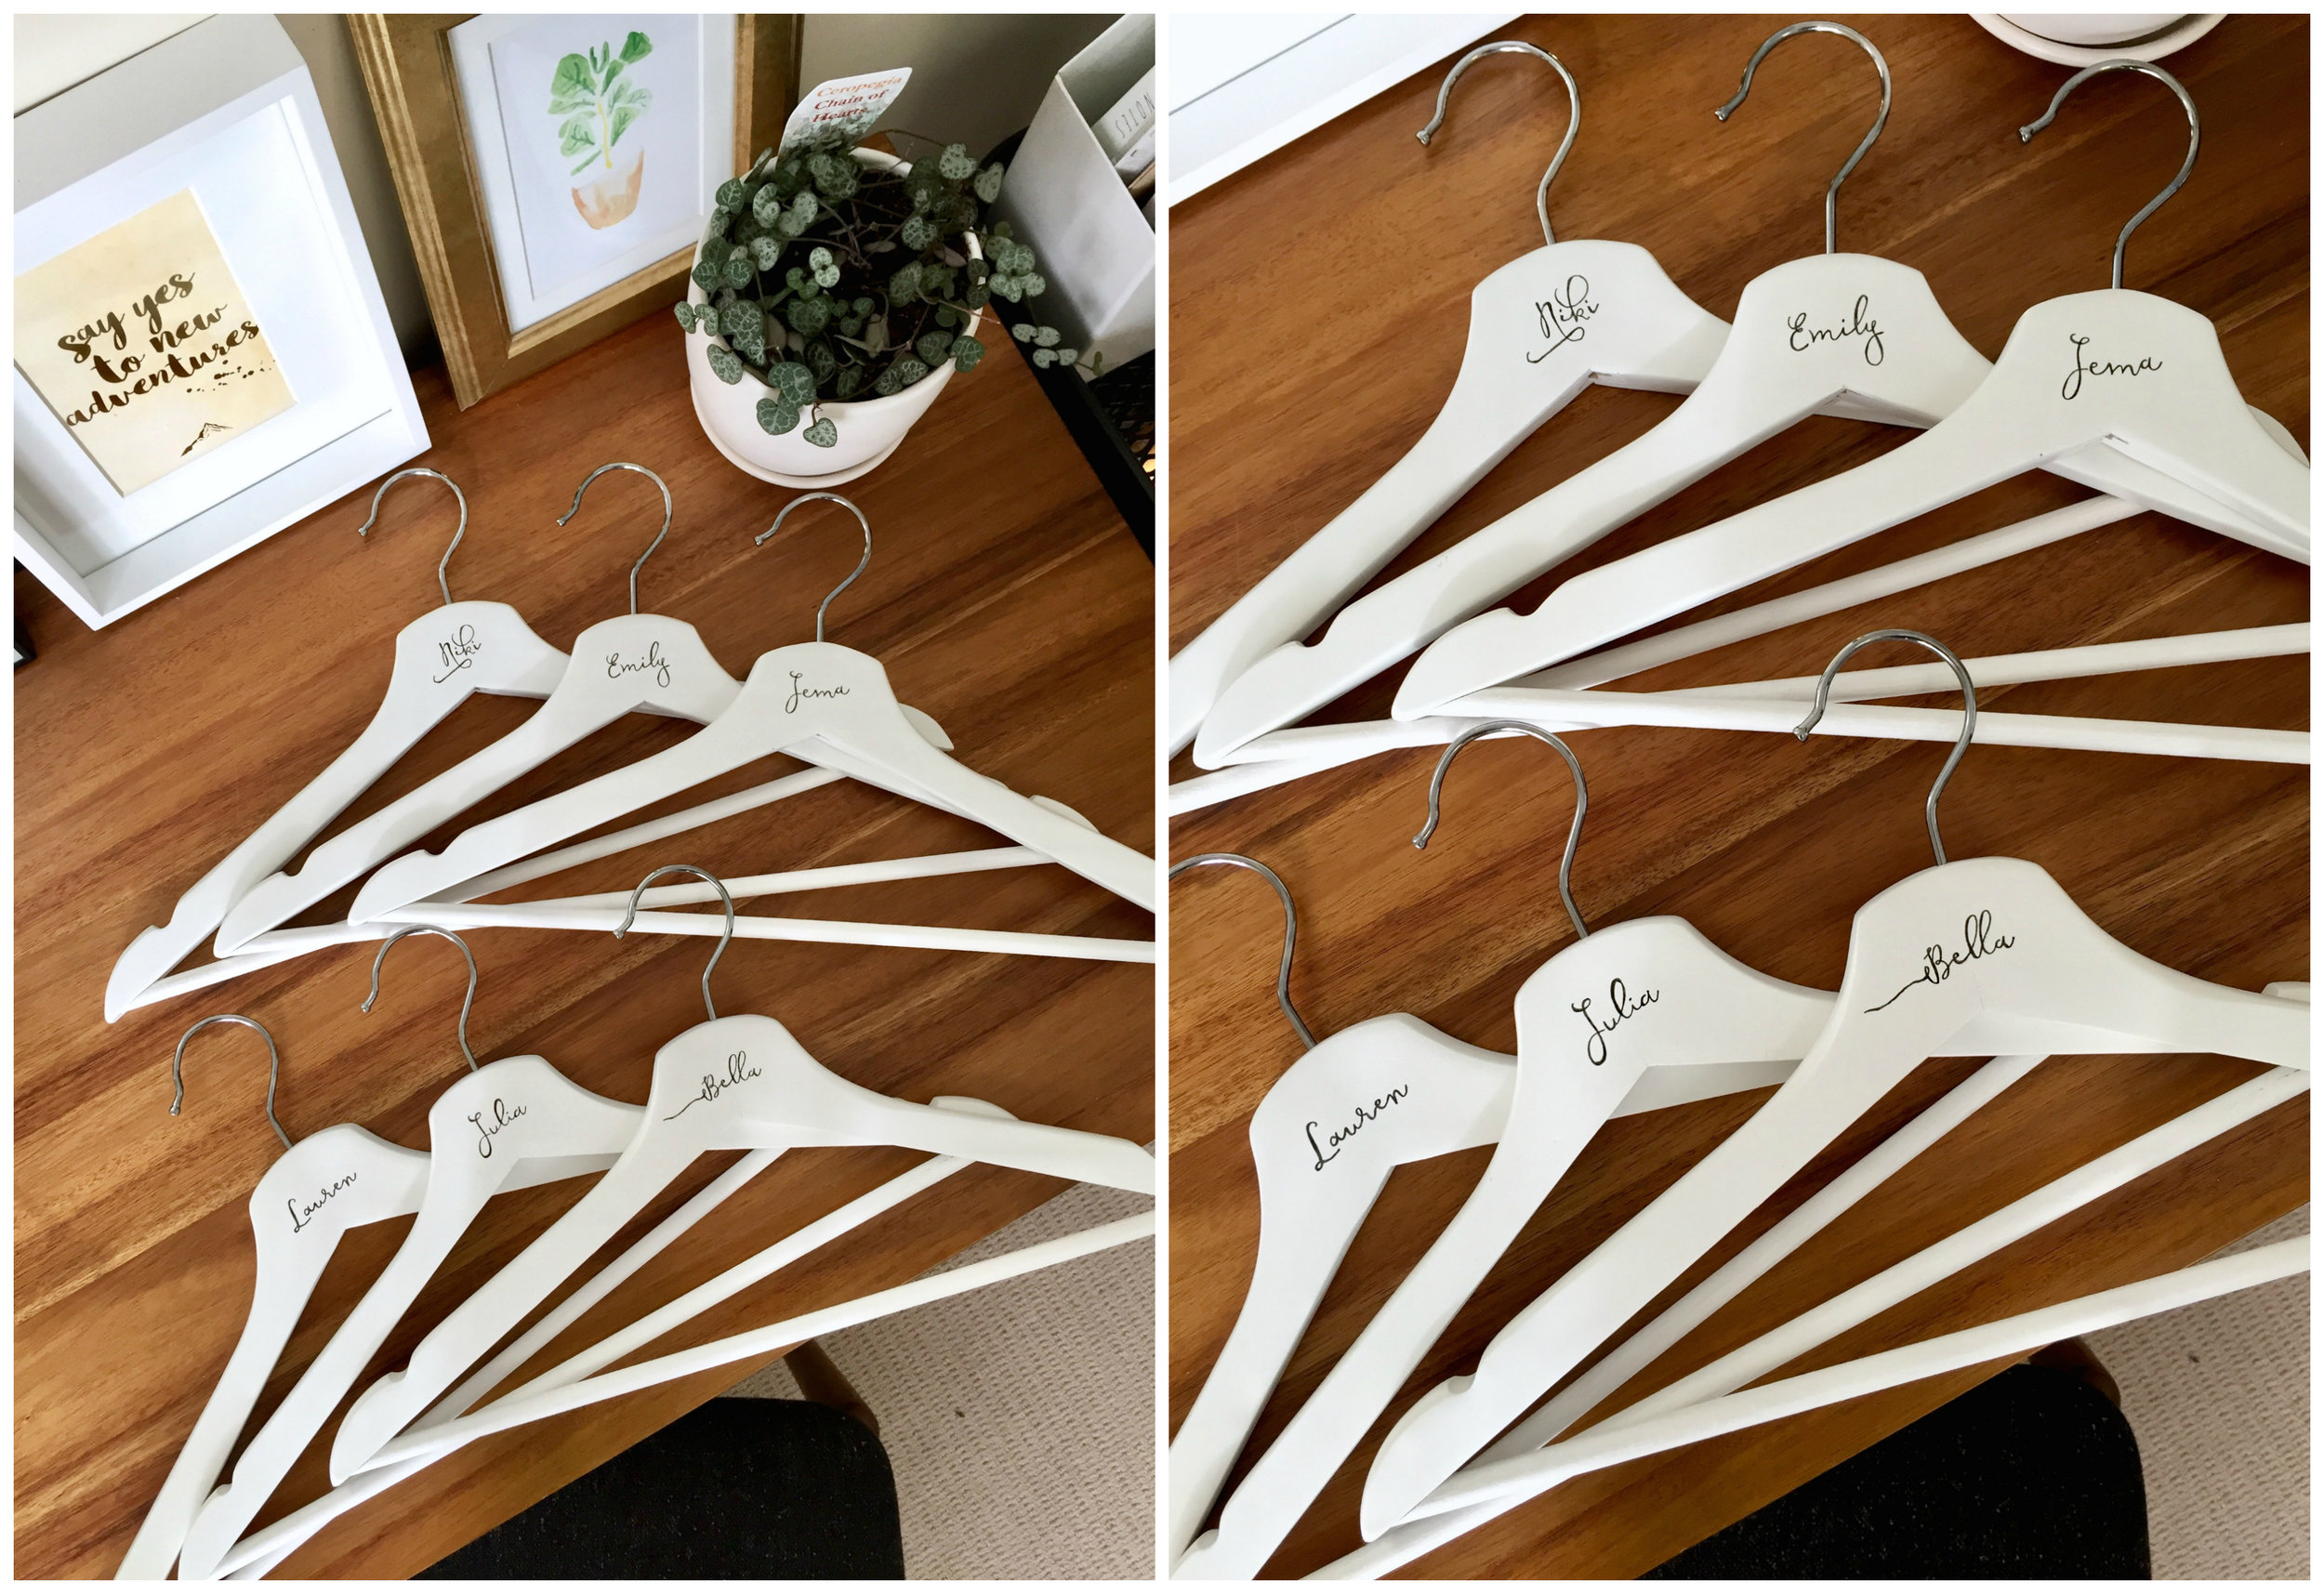
If you’ve spent any time reading wedding blogs or delved into the black hole of Pinterest wedding inspiration, you’ll be familiar with the images of bridesmaid dresses, hung in a row on beautiful personalised hangers. I think these small details add a lovely personal touch to photos, and they also make for a simple, practical gift to give your bridesmaids on the day.

While there are a myriad of these hangers available on Etsy, this was something I knew I could do myself. They were very simple and I’m pretty pleased with how they turned out, so I thought I’d share the process with you.

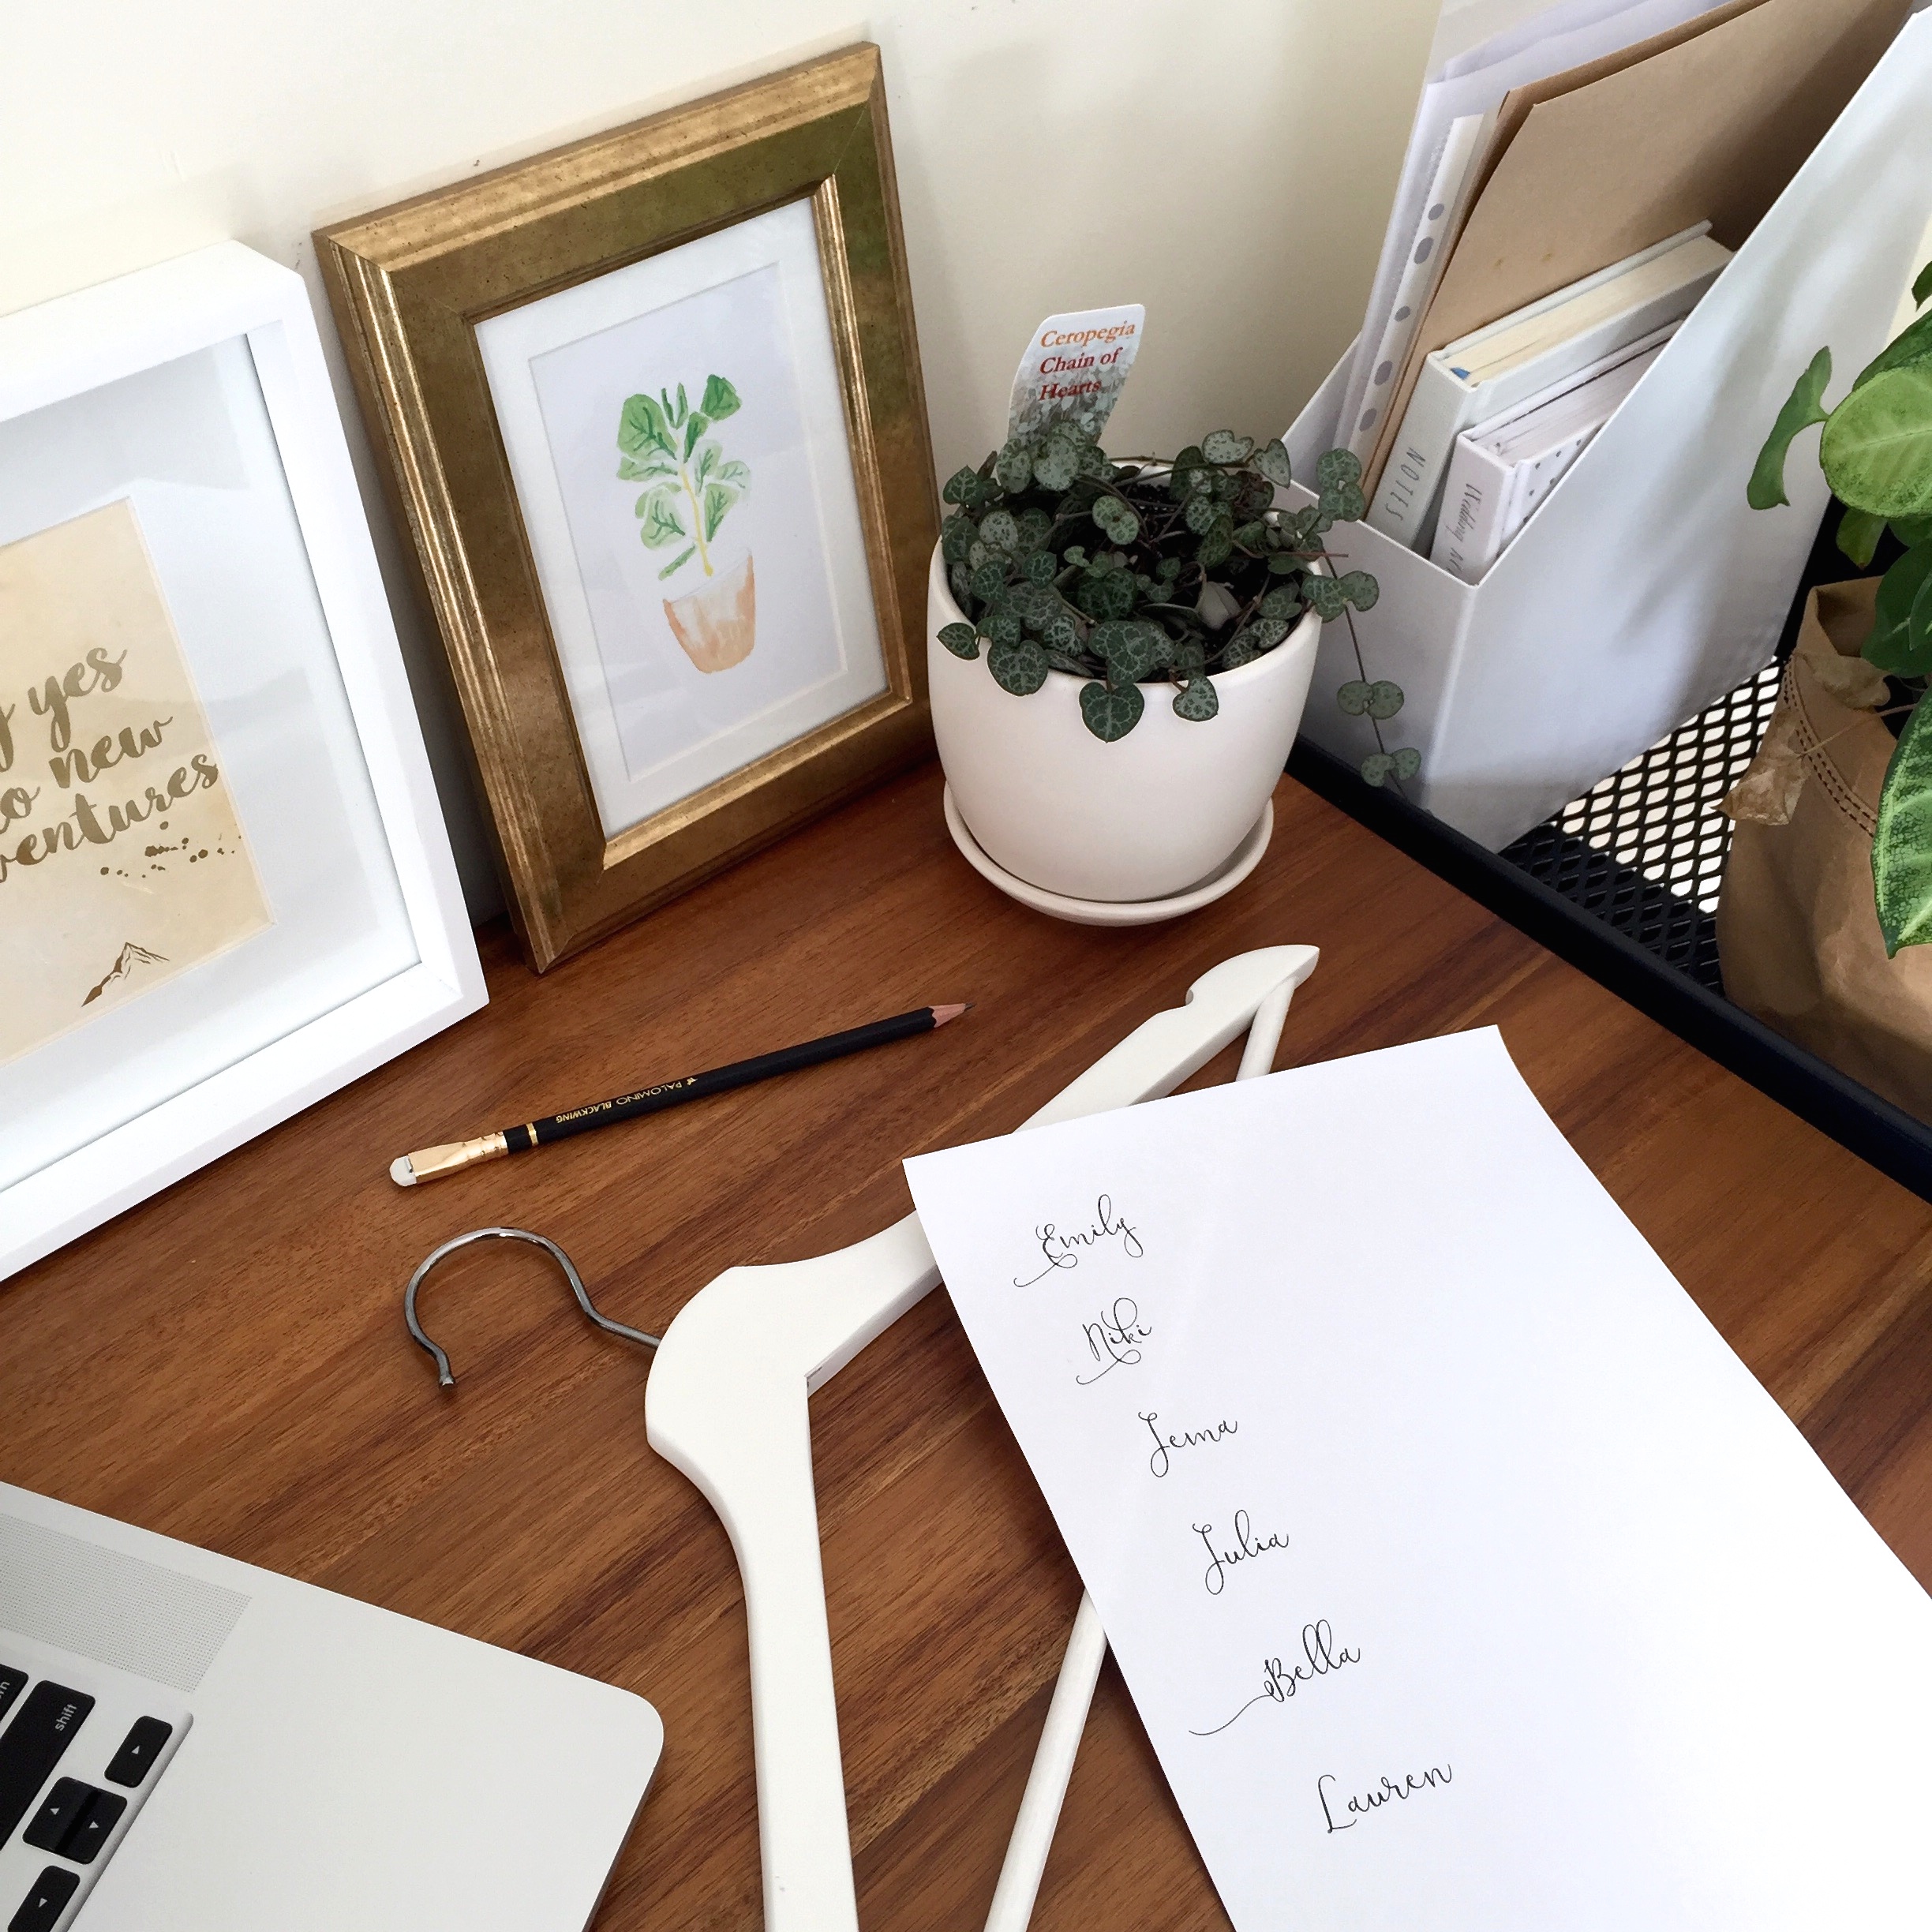
I used white wooden coat hangers from Ikea. These were $9.99 for a pack of 8. Considering a single hanger will cost at least $8 on Etsy it’s definitely much less expensive to do it yourself! This is a really simple DIY too so if you have a little time I’d recommend giving it a go!

How to DIY bridesmaid hangers2

Supplies:
1. Wooden coat hangers
2. Computer and printer
3. A lead pencil
4. A nice pen – I used a permanent felt tip pen
5. Clear nail polish (possibly... depending on the pen!)

Step 1:
Find a font you like and print out your bridesmaid’s names. I used a font called “Modesty”. This is a paid for font that I already had and is available here on Creative Market. There are plenty of free fonts available online though. I recommend searching “Free wedding fonts” on Pinterest.

Step 2:
Cut out the names and using the lead pencil, lightly shade on the back of them

FullSizeRender (32).jpg
FullSizeRender (29).jpg

Step 3:
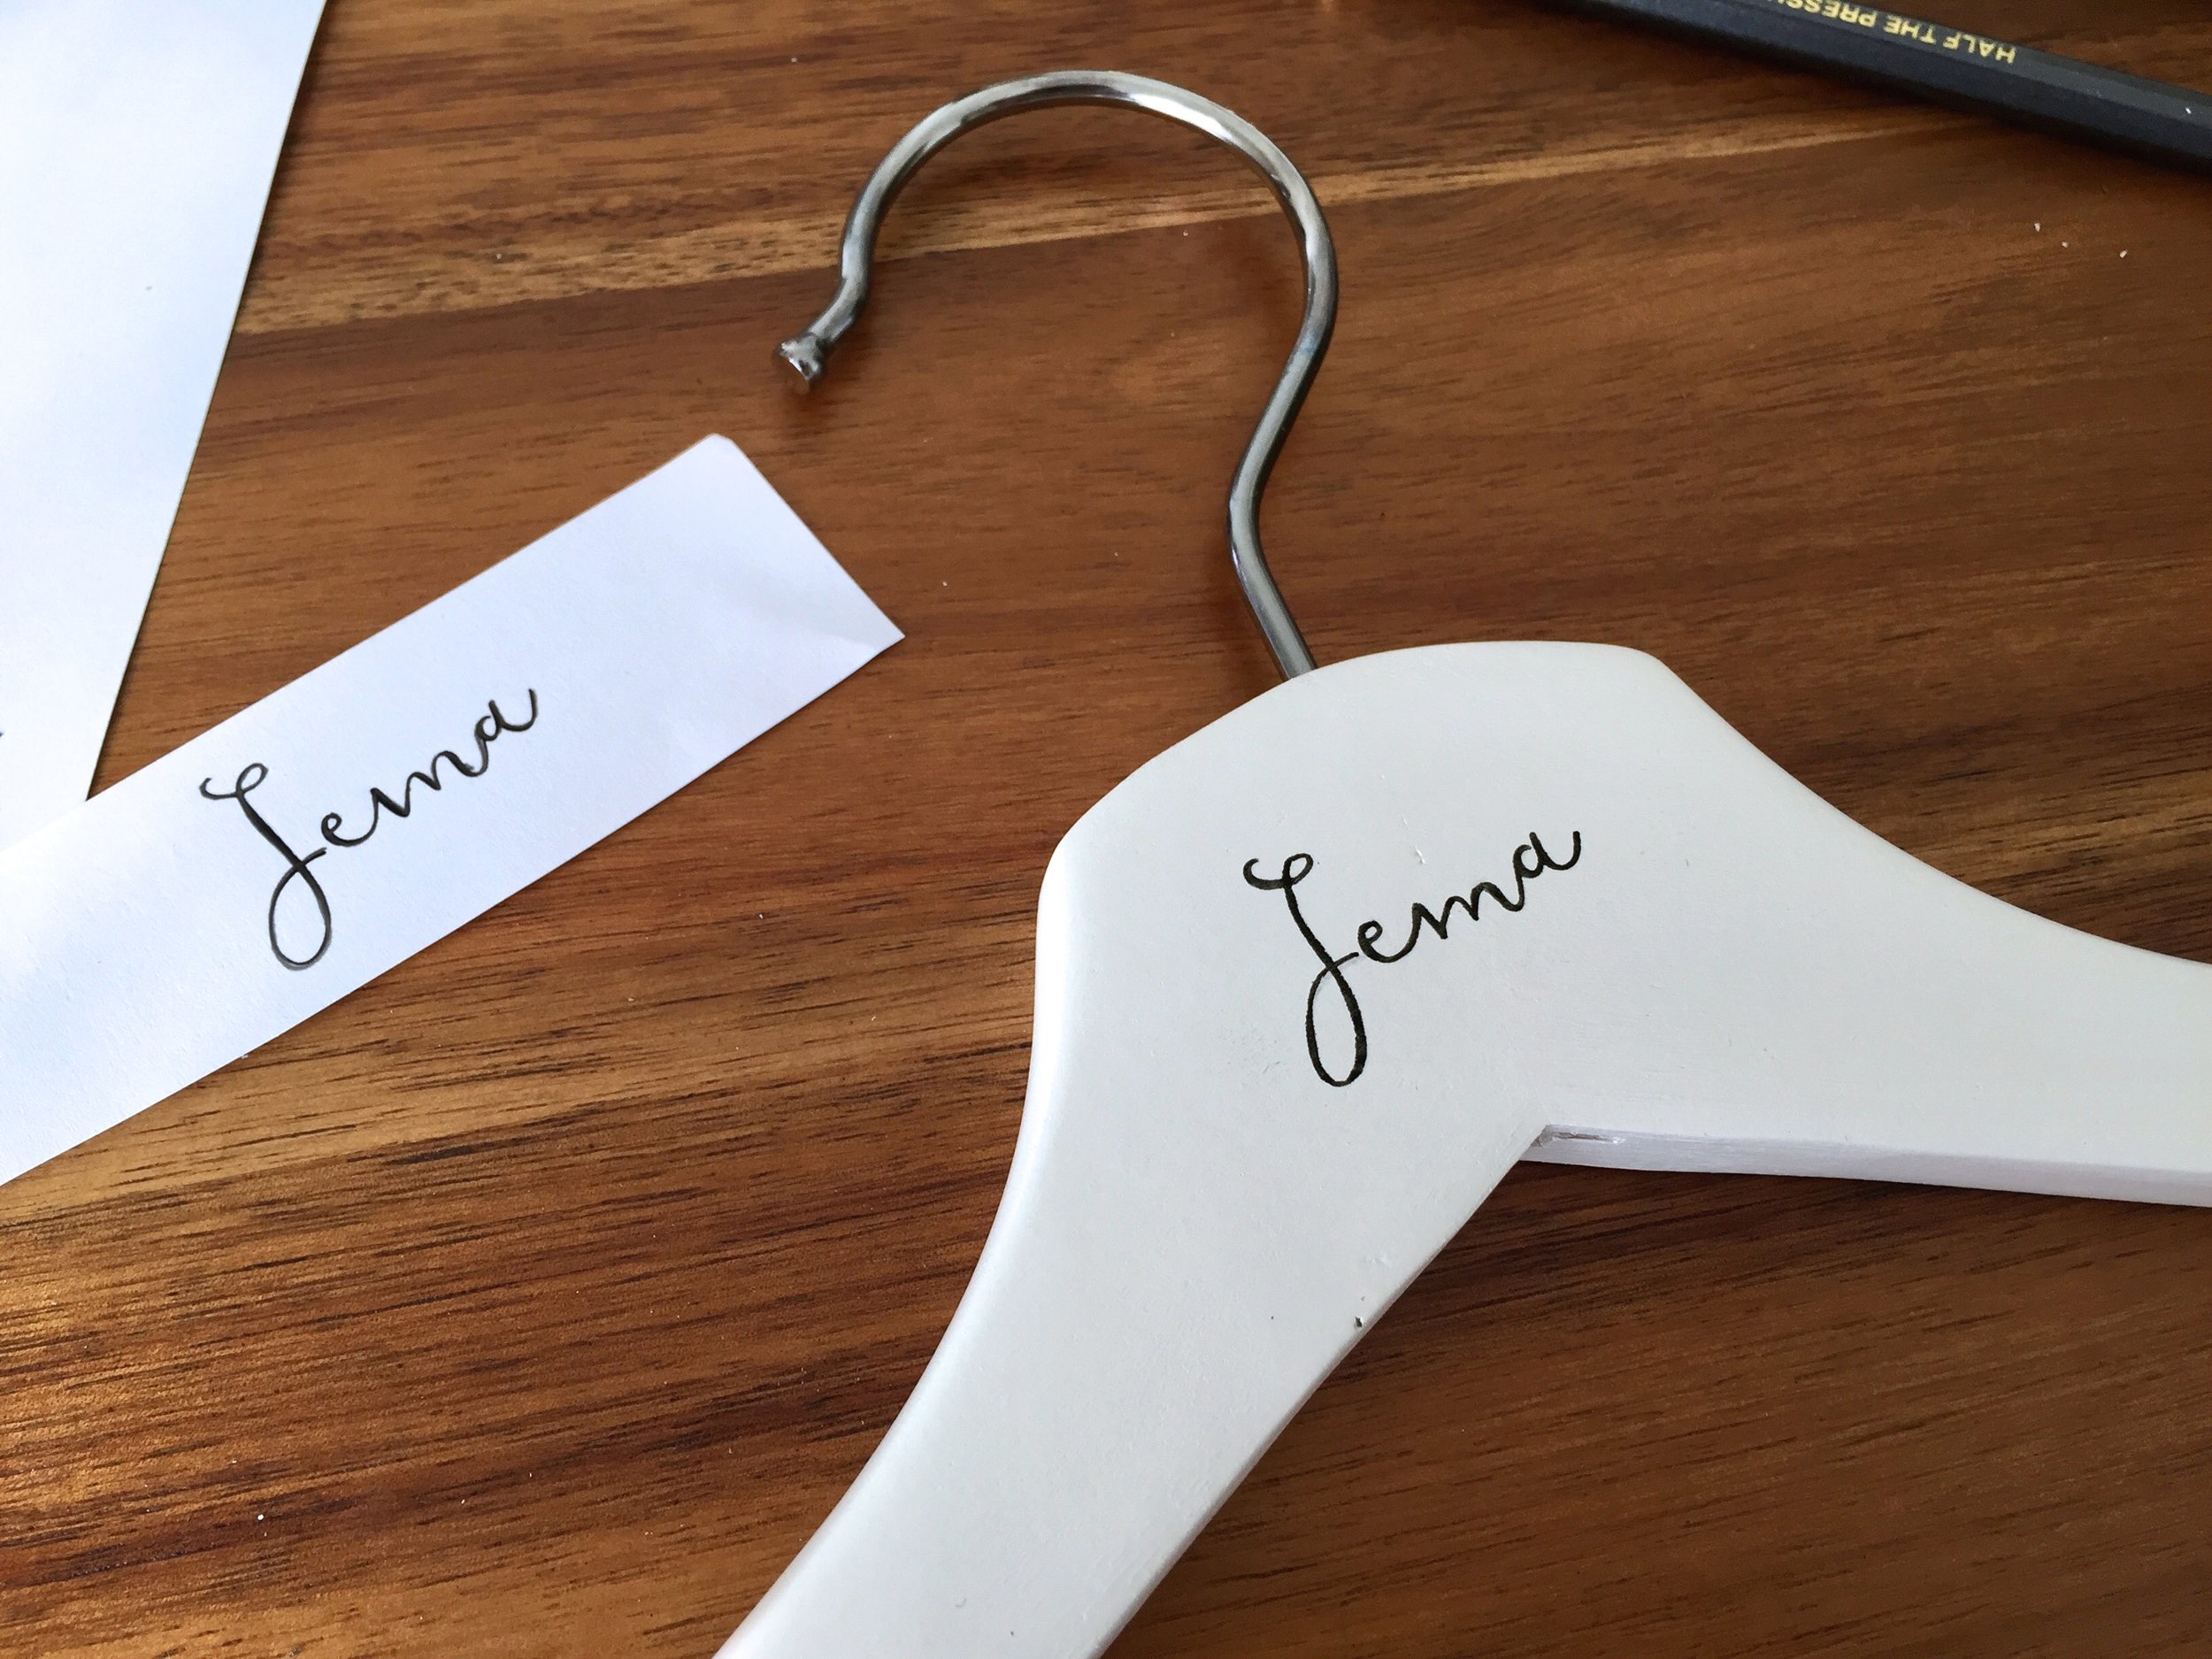
Position the name on the hanger and again using the pencil, trace over the text. This will leave a faint outline on the hanger

Step 4:
Using your pen (I used a very fine felt tip pen in black) trace over the name. The first time it won’t look the best, but you can go back in and thicken the lines to give it more of that “calligraphy” feel. 

Step 5:
Depending on the pen you use this may not be necessary, but I found that even after letting it dry, the ink was still a little smudgy (should've used a better pen Lauren!). To solve this I just painted over the writing with a coat of clear nail polish - problem solved!

FullSizeRender.jpg
FullSizeRender_1.jpg

The finished product:

FullSizeRender_5.jpg

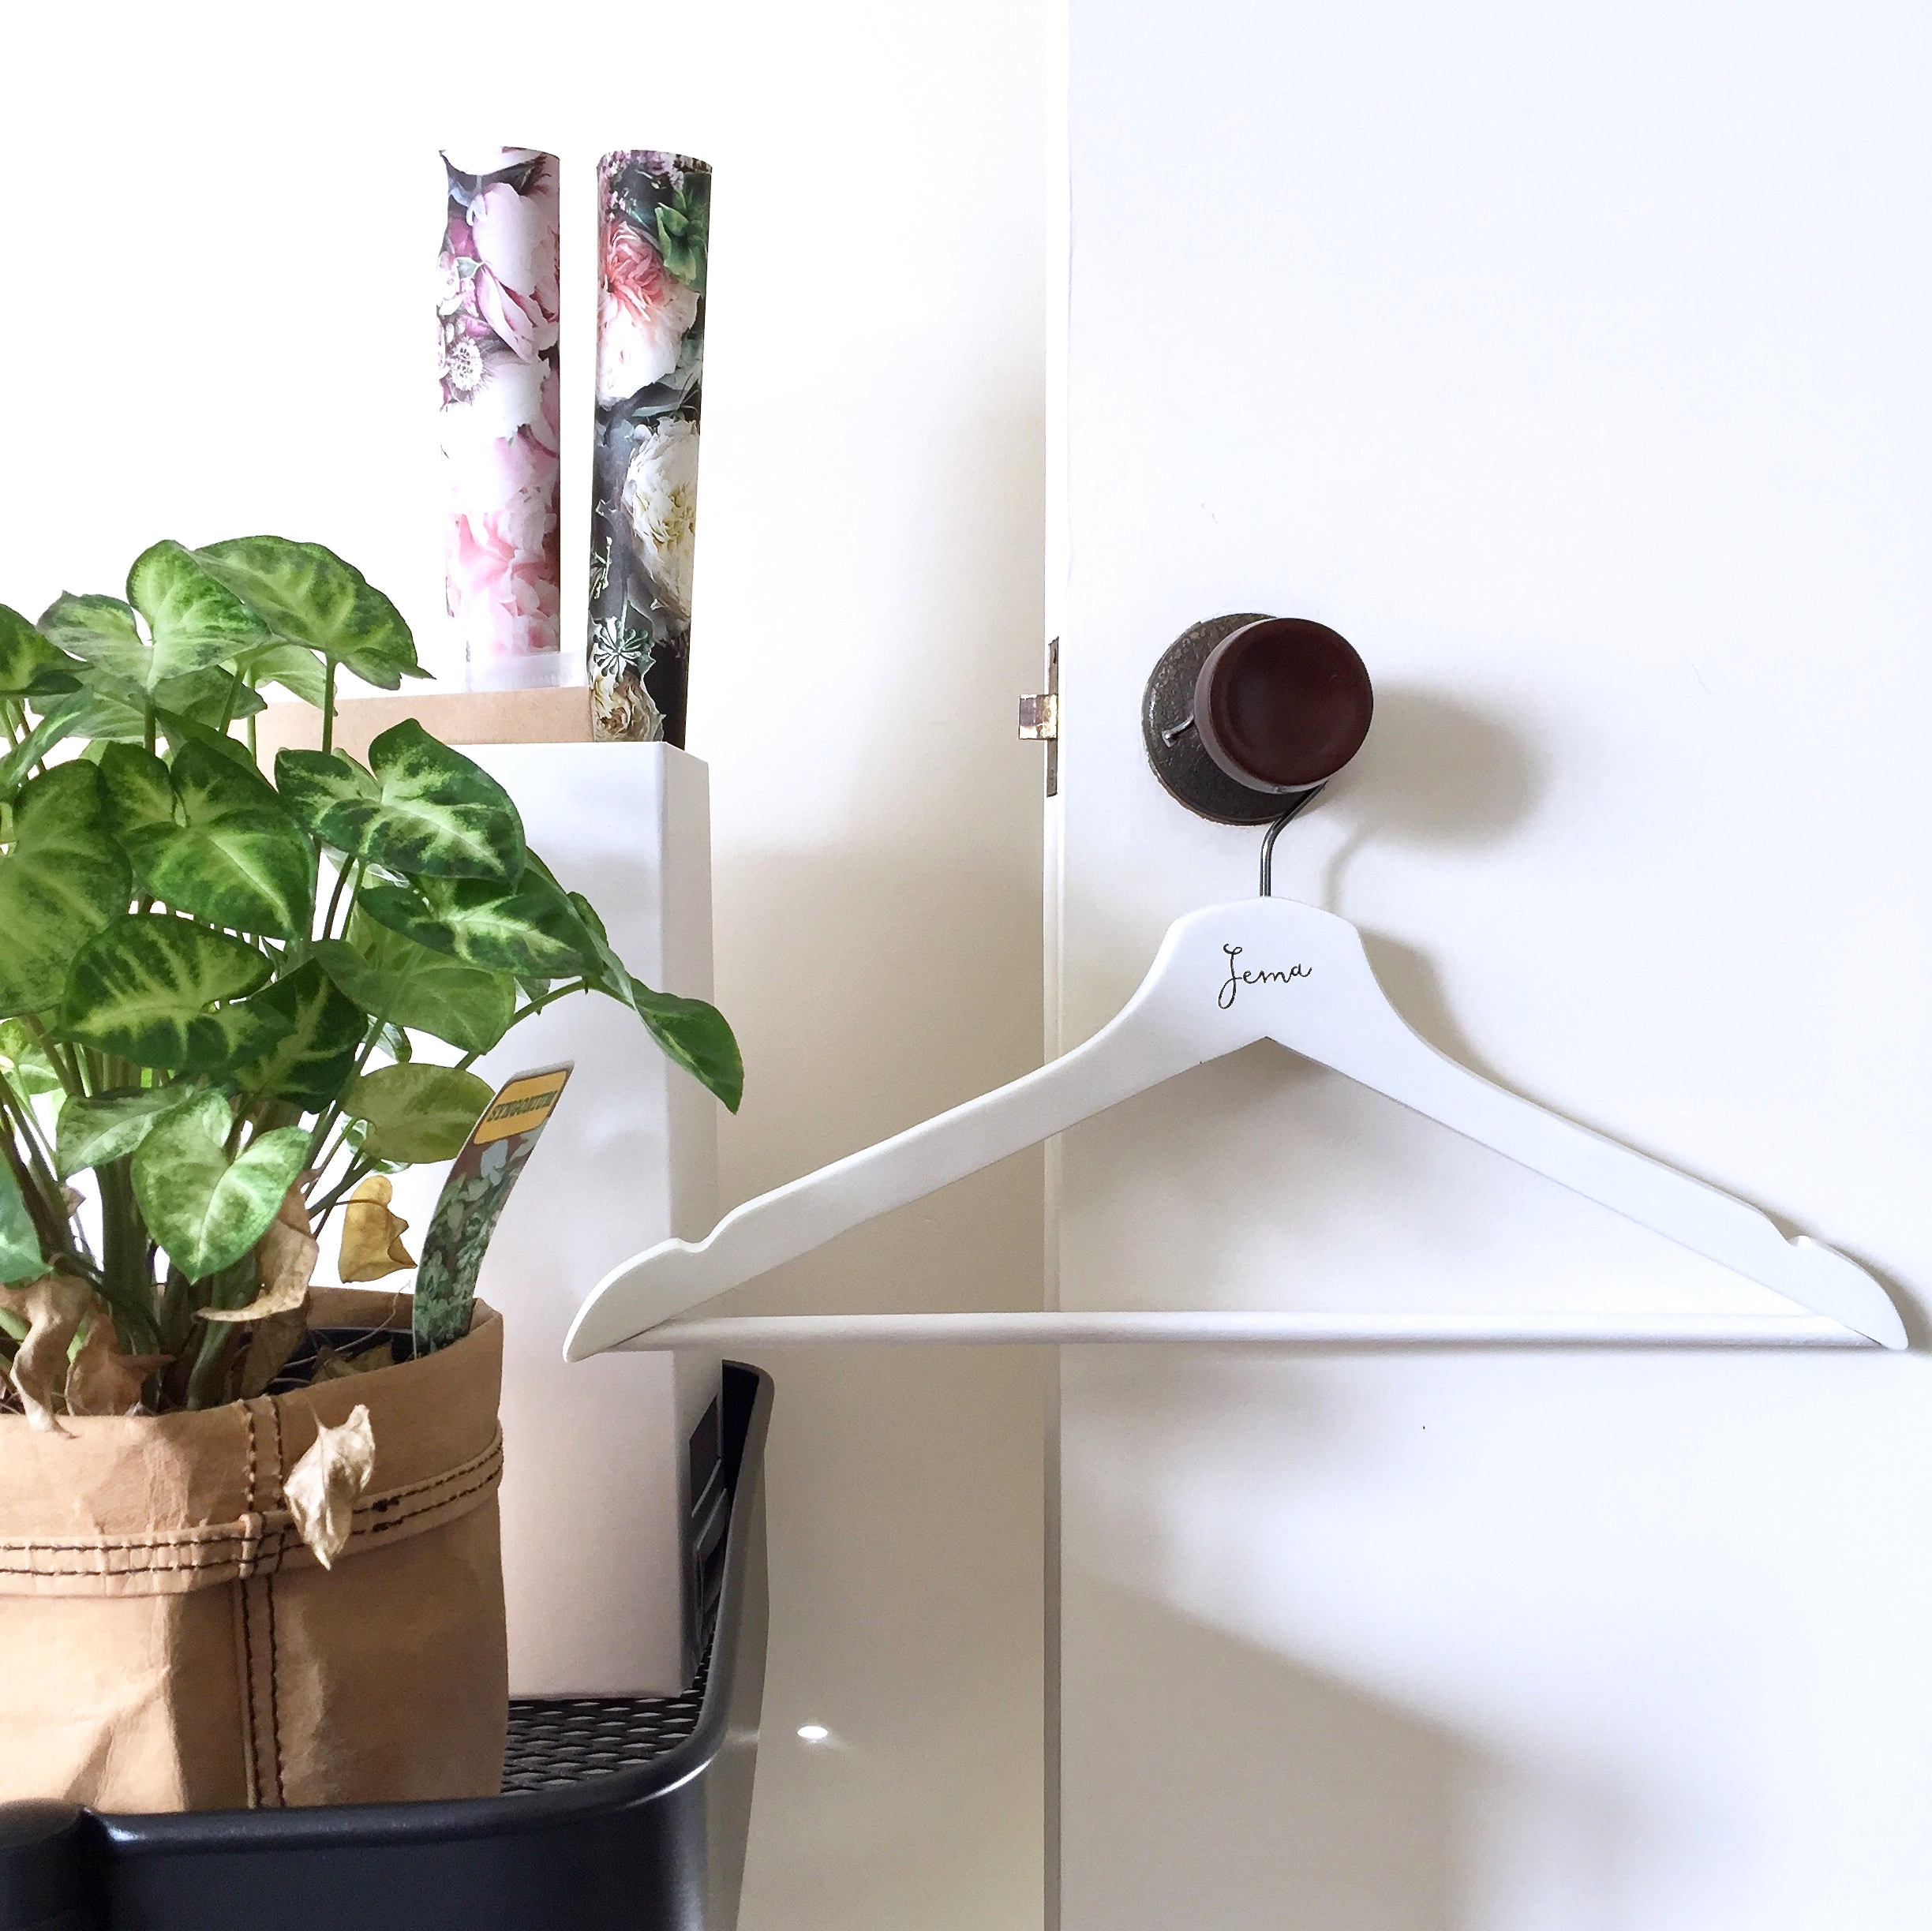
You could then tie a ribbon around the top for an extra touch. I haven’t decided if I’m going to do this yet, I kinda like the simplicity without it :)

Let me know if you give this a try! If you do make them tag me on Instagram @laurennatalia29 so I can see!

In Lifestyle Tags wedding, how to
← The Name Debate - To Change or Not To Change?Our Engagement Photos →

Hello, I'm Lauren!

I’m a mumma, blogger & photographer from sunny Perth, Western Australia.

Here you’ll find all my best tips, discoveries and honest thoughts on style, motherhood and mindset.

Come join me as I explore ways to live life to the fullest and sprinkle a little extra beauty into the everyday!

Follow

Instagram

Summer ☀️☀️☀️
.
.
.
.
.
#albercleeryfambam #summervibes #pooldays #toddlerlife #summerinperth #36weekspregnant
#36weeks bump style ☀️☀️☀️
.
Shirt - @justjeans 
Shorts + tank top @ripematernity 
Necklace @ravenjamesjewellery ✨ (so obsessed with this stunning brand by @fleurdeforce 💕💕💕 - the whole collection is 😍😍😍)
.
.
.
.
.
.
#LNbumpstyle #36weekspregna
Last of the family photo spam (for now 😝)
.
Just too many beautiful photos to choose from I couldn’t resist sharing. Promising myself I will actually print some of these and hang them on the walls this year! (Anyone else have commitment issues
Magical memories ✨✨✨
.
📷 @capturegeneration
Can’t thank you enough @capturegeneration for these magical memories 🥰💕🥰 We’ll treasure them forever 💕
.
.
.
.
.
.
.
#AlberCleeryFamBam #maternityshoot #familyphotos #preciousmemories #LNbumpstyle #33weeks #33weekspregnant #perthmumma
01/01/2022
⠀⠀⠀⠀⠀⠀⠀⠀⠀
☀️Morning at the beach (matching with @jemxu)
⠀⠀⠀⠀⠀⠀⠀⠀⠀
☀️Fish and chips for lunch 😋 @nikilauren
⠀⠀⠀⠀⠀⠀⠀⠀⠀
☀️Nap time with a very sleepy bub (who woke up and then fell back asleep on the couch next to Tom for a second nap 😴 - s
Hello 2022 🥰💕☀️ 
It’s been a fun and relaxing start to the new year - New Years Eve with friends (and home to bed by 10 😉), beach, brunch, an engagement shoot for two of my best friends and lots of naps next to this one 😴
.
Making the most
My baby all snuggled up in our bed 🥰💕 Can’t believe she’ll be a big sister in just a few short weeks 🥲🥰💕
.
So excited but also kinda nostalgic (and just a teeny bit terrrifed! 🤣) about the fact there will be two little bubbies very
Christmas Day #bumpstyle at #34weeks 😛
.
Stumbled upon this beautiful gingham dress from @ghandaclothing . I’ve been looking for something like this for ages - the print and colour is just what I was wanting and the style is so comfortable - e

On the blog this month

© 2025 Lauren Natalia